

How To Get Started
1. Open your account
- Select an internal person to be your account Administrator. As you open your new account, you will need to designate an Administrator who will be the main contact between your company and David Knox Productions, Inc.
- This person will have access to usage reports and will be responsible for maintaining an accurate and up-to-date subscriber list. Sometimes, the person who fills this role is the Training Director or IT person.
- Select the user level that most closely matches your total agent count. (Agent count will be verified via your company website or REALtrends report.)
- Provide your credit card and billing information to David Knox Productions, Inc. online or by telephone. There will be a monthly subscription charge billed to this card.
- Look for a confirmation email that provides log-in details.
2. Log in to your account
- Go to: http://www.realestatetrainingbydavidknox.com/login
- Or short URL: http://www.RETdk.com/login

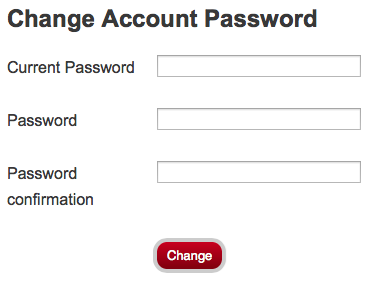
3. Change your password
- Go to "Account Settings" and change your password to one of your choice.
4. Add first users manually
- Log into your account using your email and password that was provided to you in the order confirmation email.
- Go to "Your users." (Consider adding your management team first and add your agents when you are ready to announce this new training resource to them.)
- Click on "Manually add new users" and you will see a grid in which you may quickly type in names, email addresses and a password.
- Create a generic password for each user. For simplicity, you could give every one the same password, such as the company name.
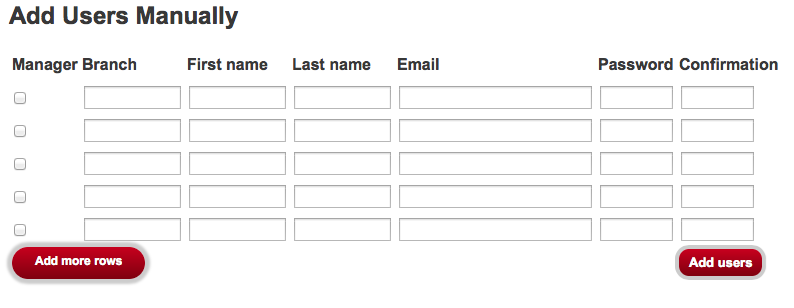
- The Branch column fields are optional. These fields may remain empty.
- Enter the Password a second time in the Confirmation column.
- Click "Add more rows" if needed.
- When done adding names, Click "Add users."
- We suggest that you delay uploading your agents until you let your management team get familiar with the training.
- Create a plan to implement the training in your company.
5. Automatic welcome emails
- Once you upload your agents, the system will send an email containing their user name and password. (You can ask for this feature to be turned off.)
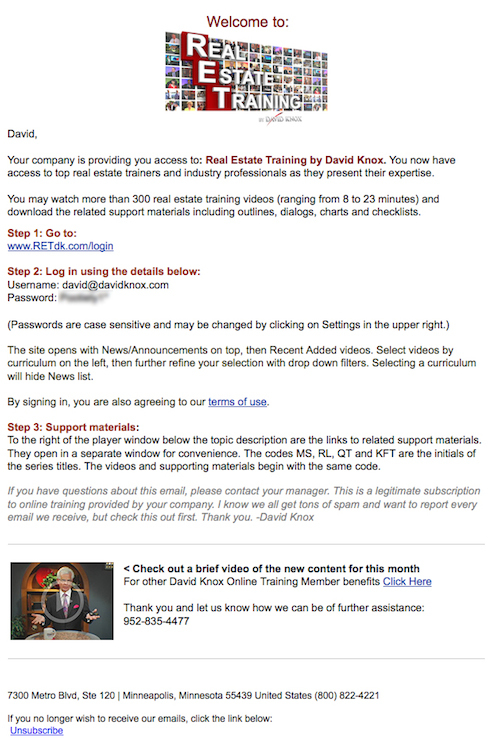
- If you want to delay emails to your agents, then wait to upload them or ask for this feature to be turned off. It may be better that you do the first broadcast email. It is less likely to get spam-filtered out and then they'll be ready to accept the automatic email.
6. Ongoing changes to your user list
- If you are adding a small group of people or want to give temporary access to a recruiting candidate, the quickest way to make changes is manually.
- Click on "Manually add new users" and follow the instructions above in the "Add First Users Manually" section.
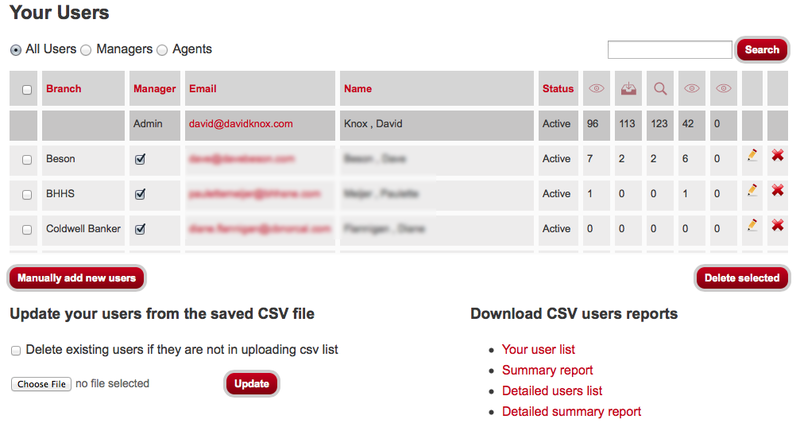
7. Deleting users
- In the "Your Users" area, note the "x" that at the far right column for every user in your list. To delete a single user, simply click on the "x." Clicking the yellow pencil allows you to edit their information and password.
- To delete multiple users, click the check boxes on the far left, then click "Delete selected." Their user information will be removed and they will no longer have access to our site.
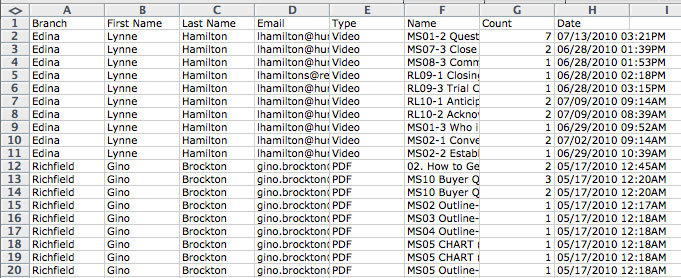
8. Uploading large lists with a Comma Separated Values (CSV) file
- Log into your account using your email and password.
- Go to "Your users."
- Click on the "Your User List" Target the folder to which you want the document saved. Most computers default to the "Downloads" folder.
- Open the file (Usually opens in Excel)
- You will see the list of users that you first input manually.
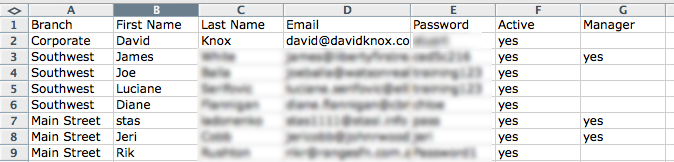
- Fill in the additional users information. (If you already have a company list, format it to match these columns and paste the data into this file.)
- Use Branch to separate your agents by office
- Designate your management team with "yes" in Manager column. They will be able to see the metrics of the agents in their office.
- Under the "Active" column, type "Yes" after each person.
- For passwords, consider using a "relative" word like the "last four of your company ID" or their copier code. You can also use Excel's Fill Down Series command to create unique passwords for each agent. For real simplicity, use their first name.
- The system will treat an empty Active Column field as a no.
- Save your changes: perform a "Save As" and today's date.
- Return to your users page, click browse, navigate to the saved spread sheet and click update.
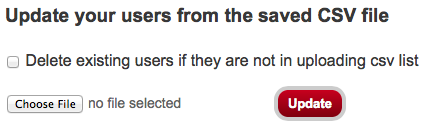
9. Updating the CSV file
- After all your initial agents are entered, you will want to make changes as you hire and fire. The updating is similar to the initial upload except that you will be adding new users to the bottom of the list and changing the status of departing agents.
- Download the CSV file as described above.
- Add new users by adding them to the bottom of the list or uploading a new list.
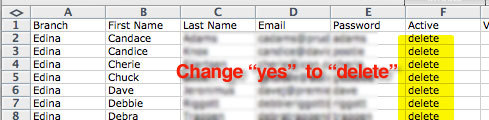
- DISABLE users in the "Active" column by changing the "yes" to "no." This will inactivate their login but keep them and their metrics in the system.
- DELETE users in the "Active" column by changing the "yes" to "delete." This will remove them from the system entirely.
- Save the file.
- Browse and update the saved file. The system will add the new names, change the status of your inactivations and deletions and leave the rest alone.
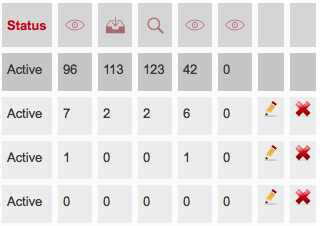
10. Track usage
You may track usage by clicking on the "stats" menu in the upper right. The page will open with a list on the left and a chart on the right. The list contains your views, downloads and searches by day, week or month. The chart on the right changes to present the selected information visually.
- Click on "Your Users" in the menu.
- Select either Download CSV summary report or CSV detailed report.

- Target the folder to which you want it saved and download the report.
- The detailed report is a more complete summary list by branch an agent
- Because this report has a "Branch" column, you may forward this file to your managers and allow them to examine just the agents in their office.
11. Company Intranet access
- If you have an intranet site, you may offer a single sign-in to your agents. This eliminates another set of usernames and passwords to remember.
- This also becomes a value proposition for your site.
- Your IT person frames our login page and writes a java script to feed their email and password to our site for easy, instant access.
12. Advanced automatic updating
- You may use an FTP (File Transfer Protocol) site to automatically update your agent list.
- Have your IT person create a process that uploads your user data file to an FTP site.
- Go to "Account Settings" and complete the required fields for your FTP site.
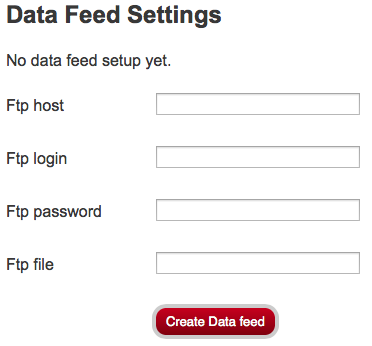
- Our system will automatically retrieve the CSV file from your FTP site and update your users.
13. Upload your company logo. You may personalize your site by having your logo appear above the curriculum. Have your logo ready to load on your computer desktop. Go to Settings > Settings. Below "Company Logo" click Choose File and navigate to your logo. Select the file and Save.
![]()
14. We'd like to hear from you so please give us feedback on:
- Overall quality of the site
- Effectiveness of the training
- Topic suggestions
- Feature requests
- Navigation issues
15. Customer support: 800-822-4221 or 952-835-4477
- Feel free to call David Knox Productions, Inc. at any time. We actually answer our phone.
- David Knox, President
- Sales, promotion to your agents, topic suggestions, training feedback - Robb Tronson, Director of Media Production
- Sales, Video issues, website, FTP or other technical issues - Mary Meyerhoff, Operations manager
- Customer log in, user lists, billing